This tutorial describes advanced project management techniques in CleverMaps Shell.
In the first tutorial, you've learned how to create a project, dump it, import a dimension and add some data & metadata. Now the project has been handed over and your clients are using it. So what about extensions? What about data updates? We sure don't want our clients to use an incomplete/broken project. We'll create a clone, perform our work there, and then elegantly put our changes back to the live project. Here's how.
| Table of Contents |
|---|
Creating a project clone
The process of creating a project clone is very similar to the process of importing a data dimension. Data dimension is a project like any other, so by importing it to your own project, you're actually creating a clone of it.
If we want to create a fresh, clean clone, we have to create a new project for it first. Log in to CleverMaps Shell and create a new project using the createProject command.
| Code Block | ||||
|---|---|---|---|---|
| ||||
CleverMaps$ login
Found config file: /home/tomas/.cleverMaps/config
	* setting /var/local/metadata as default dump directory
	* setting https://secure.clevermaps.io as default server

Successfully logged in as tomas.schmidl@clevermaps.io

tomas.schmidl@secure.clevermaps.io$ createProject --title "First project (clone)"
Created project c2ovon61uudj9lpm
Project c2ovon61uudj9lpm (First project (clone)) successfully opened

tomas.schmidl@secure.clevermaps.io/project:c2ovon61uudj9lpm$ |
Then we use the import command. We specify the --project parameter with the project's ID, and the --server parameter to import the project from the server.
| Code Block | ||||
|---|---|---|---|---|
| ||||
tomas.schmidl@secure.clevermaps.io/project:c2ovon61uudj9lpm$ import --project k5t8mf2a80tay2ng --server https://secure.clevermaps.io
Validating DWH model/data integrity of project k5t8mf2a80tay2ng... OK

Importing project k5t8mf2a80tay2ng from server https://secure.clevermaps.io... |
Let's skip some of the import command output...
| Code Block | ||||
|---|---|---|---|---|
| ||||
Import finished!
Source project: k5t8mf2a80tay2ng (First project)
Source server: https://secure.clevermaps.io
Destination project: c2ovon61uudj9lpm (First project (clone))
Destination server: https://secure.clevermaps.io
Imported datasets: 17
Imported metadata objects: 5
Imported CSV files: 9

To view detailed imported content, use status command.
Now you can make changes, or import another project.
When you're done, use addMetadata command to add the metadata to the project.
To push the data to the project, use pushProject command.

tomas.schmidl@secure.clevermaps.io/project:c2ovon61uudj9lpm/dump:2019-01-30_14-08-31$ |
After the import finishes successfully, use the addMetadata command to upload the metadata, and pushProject to upload the data.
This creates an identical clone of the original project. A clone might serve multiple purposes. It can be used as:
- a working copy of the original project (where updates are made, and which later replaces the original project)
- a base for a branched out, similar project (in order not to start from scratch)
- a backup of older version of the project (to be archived)
Restoring a backup dump
Each dump is an image of a project in a specific time. So, a local dump can be used as a backup of a project. It is useful to periodically dump the project you're working on, to save your previous work. This way, in case you break the live project, you can always revert to a previous version of the project.
The first step is to truncate the live project of all data and metadata. Open the project again to close the curent dump, and use the truncateProject command.
| Code Block | ||||
|---|---|---|---|---|
| ||||
tomas.schmidl@secure.clevermaps.io/project:k5t8mf2a80tay2ng/dump:2019-01-30_14-46-52$ openProject --project c2ovon61uudj9lpm
Project c2ovon61uudj9lpm (First project (clone)) successfully opened

tomas.schmidl@secure.clevermaps.io/project:c2ovon61uudj9lpm$ truncateProject
Truncation of project started...

Project was successfully truncated.

tomas.schmidl@secure.clevermaps.io/project:c2ovon61uudj9lpm$ |
Then use listDumps to list previous dumps of the project.
| Code Block | ||||
|---|---|---|---|---|
| ||||
tomas.schmidl@secure.clevermaps.io/project:c2ovon61uudj9lpm$ listDumps
Listing dumps of project c2ovon61uudj9lpm...

2019-01-30_14-08-31
	Dump date: Wed Jan 30 14:08:31 CET 2019
	Dump server: https://secure.clevermaps.io
	Project title: First project (clone)
	Data content:
		orp_dwh.csv (24 KB)
		cast_obec_dwh.csv (1 MB)
		zsj_d_dwh.csv (3 MB)
		obec_dwh.csv (761 KB)
		okres_dwh.csv (9 KB)
		transactions.csv (1 MB)
		zsj_dwh.csv (2 MB)
		obec_momc_dwh.csv (754 KB)
		kraj_dwh.csv (1 KB)
	Metadata content: 1 metrics, 17 datasets, 1 indicators, 1 dashboards, 1 views, 1 indicatorDrills

2019-01-30_14-46-52
	Dump date: Wed Jan 30 14:46:52 CET 2019
	Dump server: https://secure.clevermaps.io
	Project title: First project (clone)
	Data content:
		orp_dwh.csv (24 KB)
		cast_obec_dwh.csv (1 MB)
		zsj_d_dwh.csv (3 MB)
		obec_dwh.csv (761 KB)
		okres_dwh.csv (9 KB)
		transactions.csv (1 MB)
		zsj_dwh.csv (2 MB)
		obec_momc_dwh.csv (754 KB)
		kraj_dwh.csv (1 KB)
	Metadata content: 1 metrics, 17 datasets, 1 indicators, 1 dashboards, 1 views, 1 indicatorDrills

tomas.schmidl@secure.clevermaps.io/project:c2ovon61uudj9lpm$ |
We've decided that we want to roll the project back to the previous dump with id 2019-01-30_14-08-31. This is possible by specifying the --dump parameter.
| Code Block | ||||
|---|---|---|---|---|
| ||||
tomas.schmidl@secure.clevermaps.io/project:c2ovon61uudj9lpm$ import --dump 2019-01-30_14-08-31
Checking if the project c2ovon61uudj9lpm is empty... OK

Importing local dump 2019-01-30_14-08-31 of project c2ovon61uudj9lpm... |
Import with --dump parameter will first check if the project is empty. It is, because we've truncated it earlier. This behaviour can be overriden by specifying the --force parameter.
Let's skip some of the import command output again...
| Code Block | ||||
|---|---|---|---|---|
| ||||
Import finished!
Source project: c2ovon61uudj9lpm (First project (clone))
Source dump: 2019-01-30_14-08-31
Destination project: c2ovon61uudj9lpm (First project (clone))
Destination dump: 2019-01-30_16-57-02
Imported metadata objects: 22
Imported CSV files: 9

To view detailed imported content, use status command.
When you're done, use addMetadata command to add the metadata to the project.
To push the data to the project, use pushProject command.

tomas.schmidl@secure.clevermaps.io/project:c2ovon61uudj9lpm/dump:2019-01-30_16-57-02$ |
The final step to restore the backup dump is to upload the data and metadata to the project. As usually, use addMetadata and pushProject to do that.
| Info | ||
|---|---|---|
| ||
The
|
Updating a live project
Now that we've done some work on the project clone, we want to transfer the changes to the live project.
So with the premise that we don't want our clients to use use an incomplete/broken project still in mind, what can we do? Before we update the data and metadata, we will set the project's status to disabled, using the editProject command.
| Code Block | ||||
|---|---|---|---|---|
| ||||
tomas.schmidl@secure.clevermaps.io$ editProject --project k5t8mf2a80tay2ng --newStatus disabled
Project status changed to "disabled"

tomas.schmidl@secure.clevermaps.io$ |
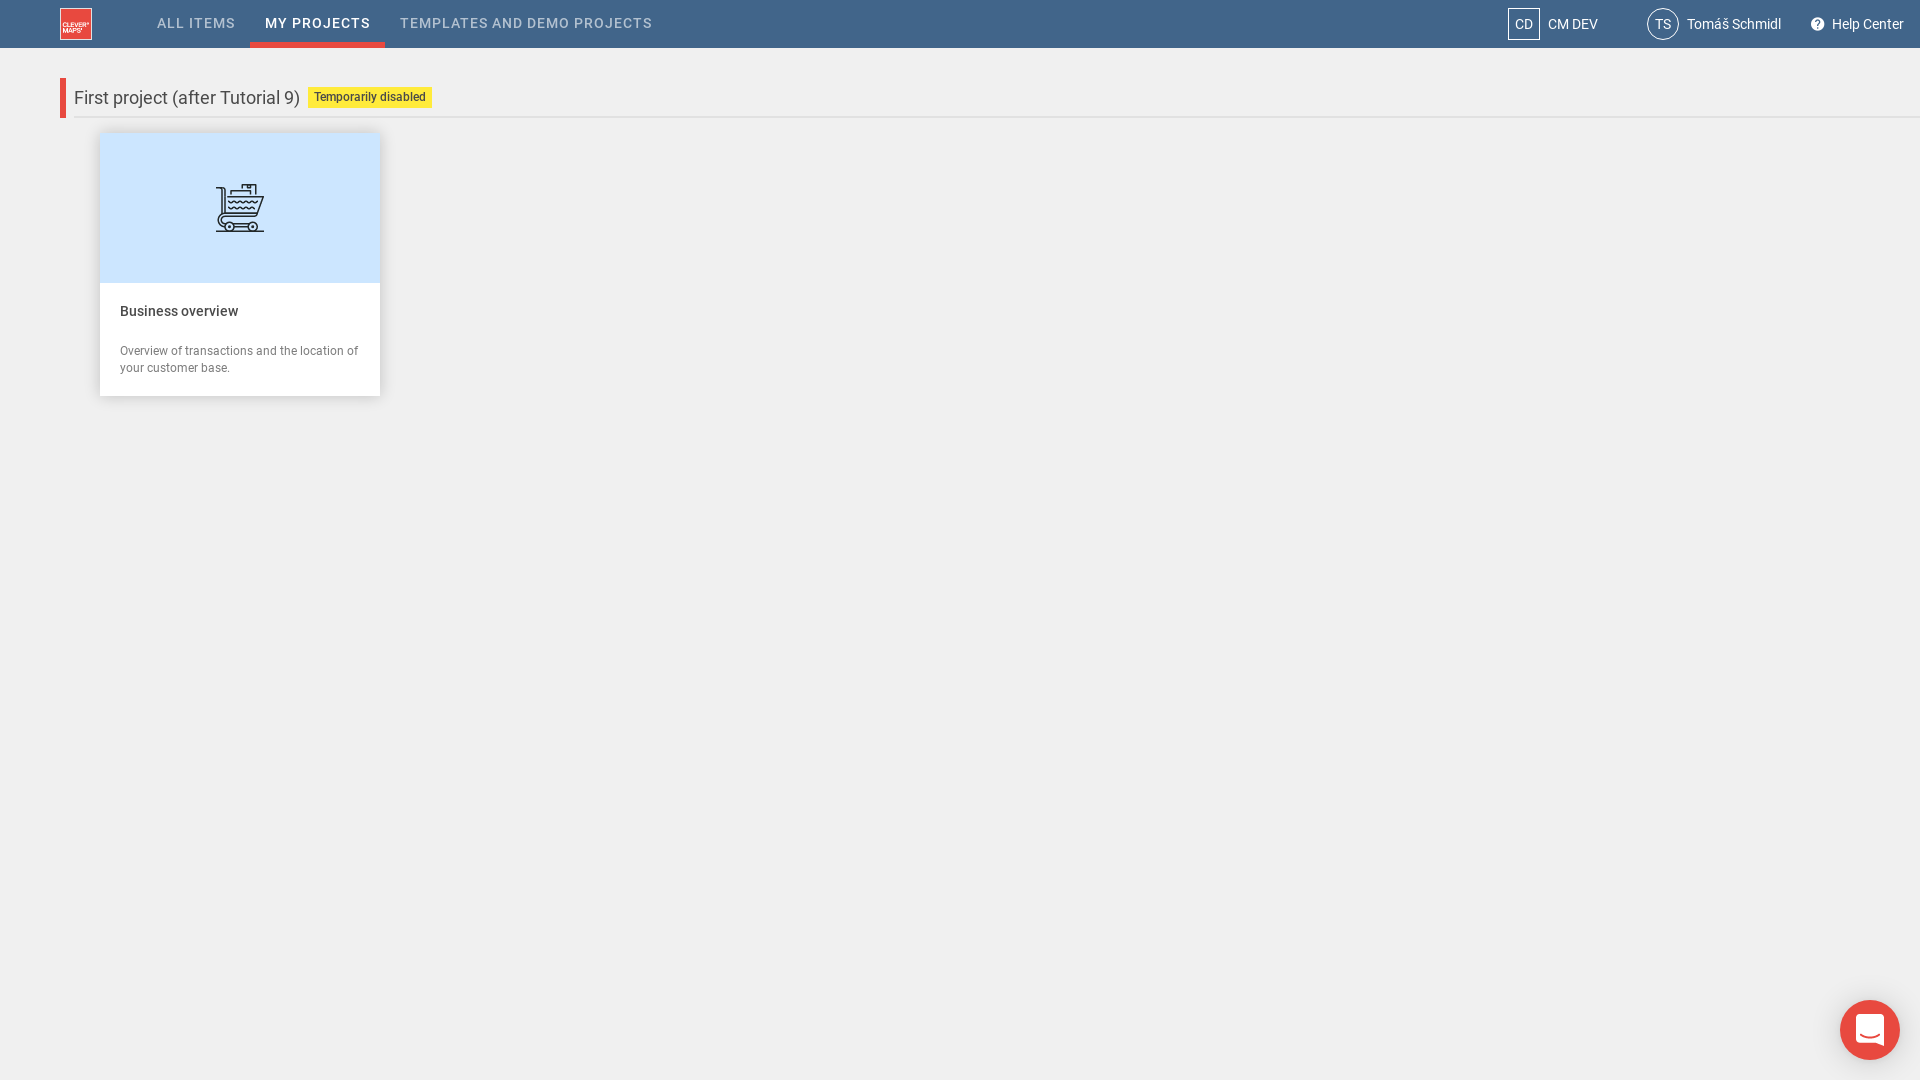
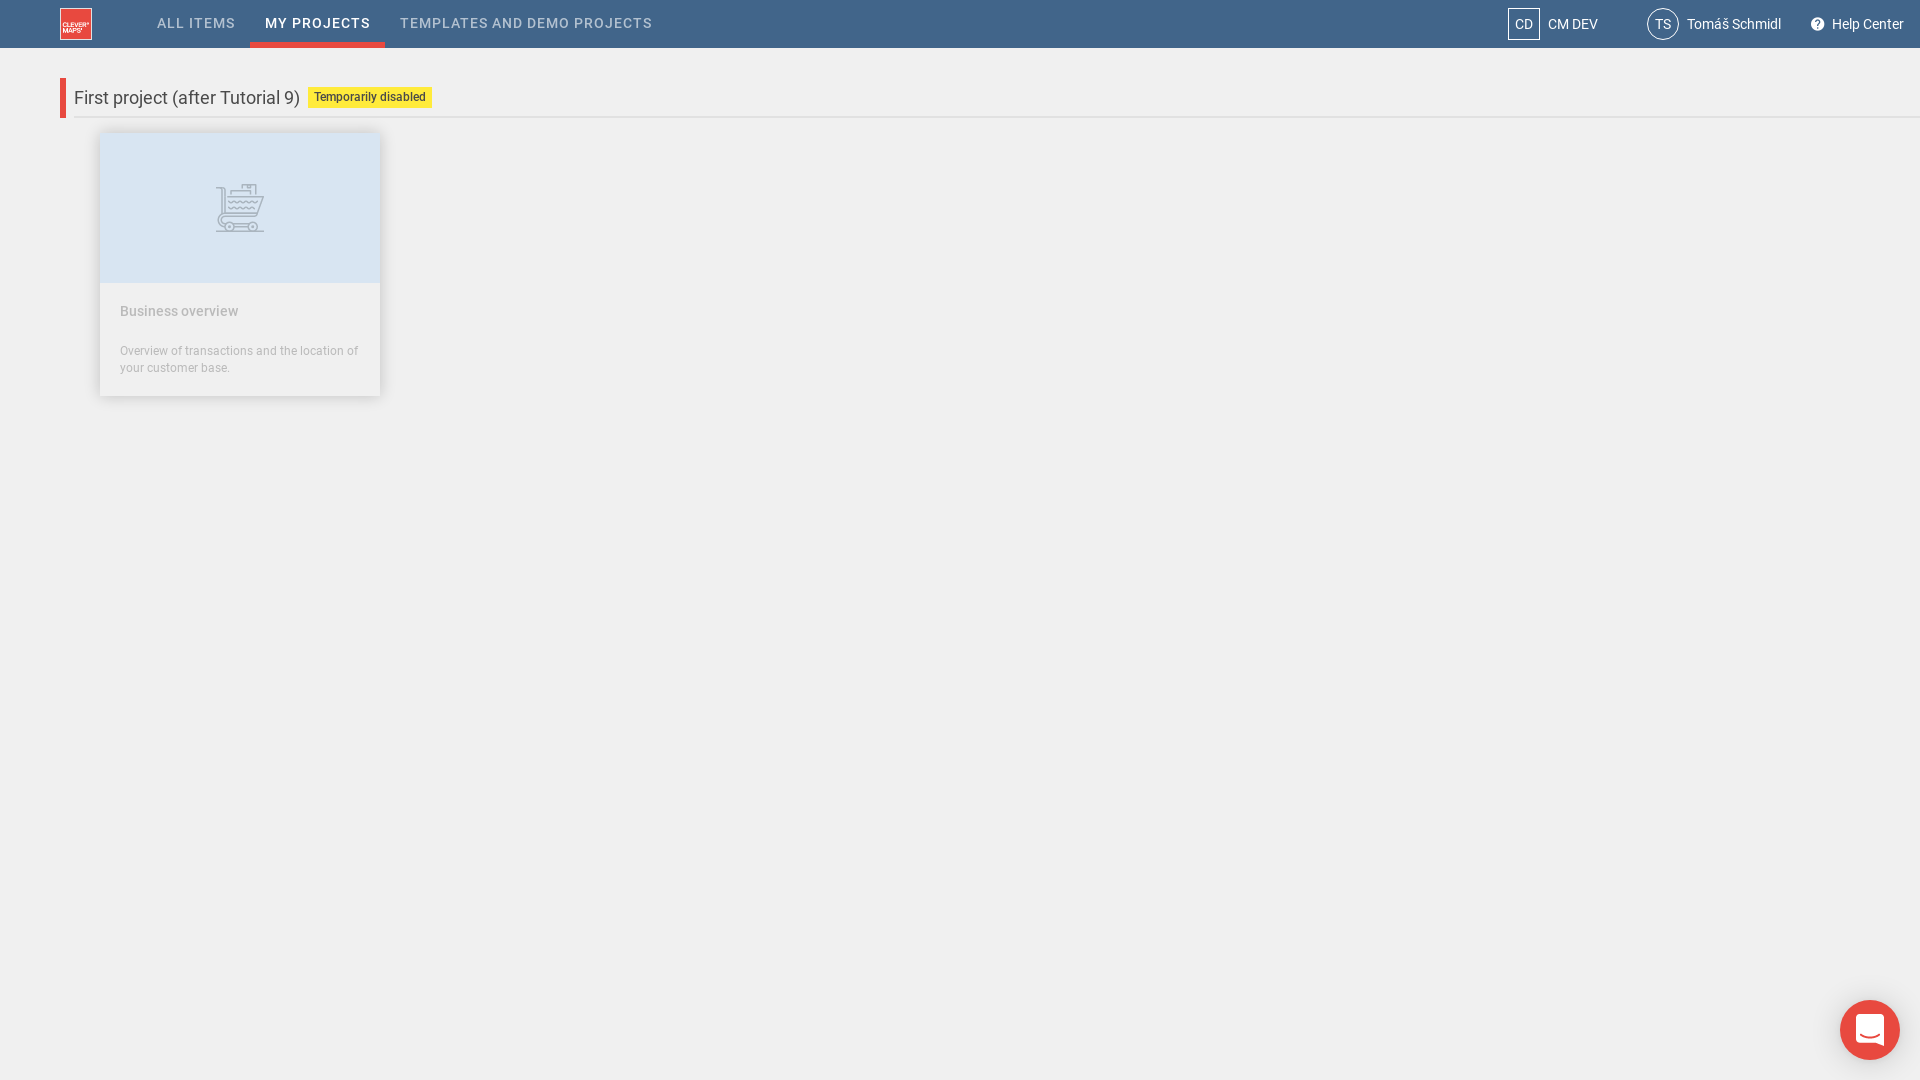
Setting the project's status to disabled displays a maintenance notification to the user. This notification varies for different user roles:
- Admin role sees a popup window (which can be dismissed) and a warning bar at the bottom and can still access all project's views
- Editor, Load data and Viewer roles can access the Project page, but cannot access any of the project's views
So you, as an Admin can still review the changes you've made, but other users are informed about the maintenance and are told to come back later.
...
...
With the live project being disabled, we can truncate it of all data and metadata. Open the project again to close the curent dump, and use the truncateProject command.
| Code Block | ||||
|---|---|---|---|---|
| ||||
tomas.schmidl@secure.clevermaps.io$ openProject --project k5t8mf2a80tay2ng
Project k5t8mf2a80tay2ng (First project) successfully opened

tomas.schmidl@secure.clevermaps.io/project:k5t8mf2a80tay2ng$ truncateProject
Truncation of project started...

Project was successfully truncated.

tomas.schmidl@secure.clevermaps.io/project:k5t8mf2a80tay2ng$ |
Now, we will import the latest dump of the clone project, where we've done all the work. Use import command with both --dump and --project parameters.
| Code Block | ||||
|---|---|---|---|---|
| ||||
tomas.schmidl@secure.clevermaps.io/project:k5t8mf2a80tay2ng$ import --project c2ovon61uudj9lpm --dump 2019-01-30_17-12-09
Checking if the project k5t8mf2a80tay2ng is empty... OK

Importing local dump 2019-01-30_17-12-09 of project c2ovon61uudj9lpm... |
Let's skip some of the import command output again...
| Code Block | ||||
|---|---|---|---|---|
| ||||
Import finished!
Source project: c2ovon61uudj9lpm (First project (clone))
Source dump: 2019-01-30_17-12-09
Destination project: k5t8mf2a80tay2ng (First project)
Destination dump: 2019-01-30_17-23-40
Imported metadata objects: 22
Imported CSV files: 9

To view detailed imported content, use status command.
When you're done, use addMetadata command to add the metadata to the project.
To push the data to the project, use pushProject command.

tomas.schmidl@secure.clevermaps.io/project:k5t8mf2a80tay2ng/dump:2019-01-30_17-23-40$ |
And as the finish message tells us, use the usual addMetadata and pushProject commands to upload the updated dump to the live project.
After that, you as an Admin can open the project in the application. Dismiss the "Maintenance is under way" popup window, enter the Transactions view, and check out if everything works, and the changes you've done in the clone project are there.
Finally, we can switch the project's status back to enabled, and let all our users in.
| Code Block | ||||
|---|---|---|---|---|
| ||||
tomas.schmidl@secure.clevermaps.io/project:k5t8mf2a80tay2ng/dump:2019-01-30_17-23-40$ editProject --project k5t8mf2a80tay2ng --newStatus enabled
Project status changed to "enabled"

tomas.schmidl@secure.clevermaps.io/project:k5t8mf2a80tay2ng/dump:2019-01-30_17-23-40$ |
| Info | ||||||||
|---|---|---|---|---|---|---|---|---|
| ||||||||
| Panel | ||||||||
| ||||||||
The content you are trying to reach has been moved here: https://docs.clevermaps.io/docs/tutorial-9-shell-project-managementWe are proud to announce that we have launched a new documentation. Please update your saved links and bookmarks to follow a new address docs.clevermaps.io. |