CleverMaps provides many ready-to-use geographic dimensions such as administrative units or H3 grids. But sometimes you may need to use your own geographic data - e.g. road segments, buildings or sales areas. This tutorial describes how to import such a custom geographic data into the CleverMaps.
CleverMaps uses vector tiles technology to render geographic data on a map. Currently we use Mapbox as a backend service for hosting and serving vector tiles but other technologies can be also used (e.g. MapTiler). Some further information about vector tiles can be found here https://docs.mapbox.com/vector-tiles/reference/. The tutorial below assumes that Mapbox is used as a backend service.
To transform your geographic data (SHP, GeoJSON, CSV, …) into the CleverMaps you typically need to:
create vector tileset at Mapbox
create datasets in CleverMaps:
vector tileset dataset- it only references vector tileset from Mapbox over URLgeometryPolygonorgeometryLine dataset- it holds all columns which should be visible in CleverMaps (e.g. road class, building type, sales area name, ...) plus some system columns (primary key, bounding box coordinates)
More information about CleverMaps datasets types can be found here Datasets
1. Creating vector tileset at Mapbox
You have two options for creating a vector tiles from your geodata files (SHP, GeoJSON, CSV…) - using Mapbox Studio or CleverMaps tool MapboxUtils.
Using Mapbox Studio
graphical user interface
limits:
20 uploads per month
maximum 300 MB per upload
cannot set zoom levels and other parameters
you pay for tiles generation and storage
detailed instructions can be found here https://docs.mapbox.com/studio-manual/reference/tilesets/
Using CleverMaps tool MapboxUtils
command line interface
Docker required https://docs.docker.com/get-docker/
suitable for one time usage or for automatization (e.g. daily updates)
no upload limits
vector tiles fine tuning (e.g. zoom levels)
vector tiles are generated locally by tool so you pay only for storage
detailed instructions can be found here MapboxUtils (Docker)
![]() Things to keep in mind:
Things to keep in mind:
Data has to be in WGS84 coordinate system
Vector tiles supports only simple geometries like Point, Line and Polygon.
2. Creating datasets in CleverMaps
Now we need to create some tables and metadata JSON files in CleverMaps. As described earlier we need to create two datasets at CleverMaps:
vector tile dataset (
vt dataset)datawarehouse dataset (
dwh dataset) with subtypegeometryPolygonorgeometryLine
To create these two datasets please follow the instructions here Datasets. Some more things to keep in mind:
the
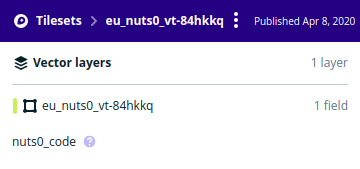
dwh datasetmust contain primary key column with the same name as the Mapbox vector tileset (as thenuts0_codein the screenshot below)the
dwh datasetmust contain the bounding box coordinates columnsx_min, x_max, y_min, y_maxfor each geometry feature (road, building, sales area, ..) - you can calculate it using some standard GIS tool or you can use CleverMaps toolSpatialUtilsSpatialUtils (Docker)the
dwh datasetcan contain any other columns from your original source geodata (except geometry column)the name of the
vt datasetneeds to be same as the layer name in Mapbox (as theeu_nuts0_vt-84hkkqin the screenshot below)the
vt datasetshould only contain primary key field and geometry, other columns should be stored only indwh datasetthe data type of primary key of
dwh datasethas to be same as in vector tileset Mapboxcreate default public token at Mapbox Studio and place it into the key
urlTemplateinstead of placeholder{token}in thevt datasetJSON file